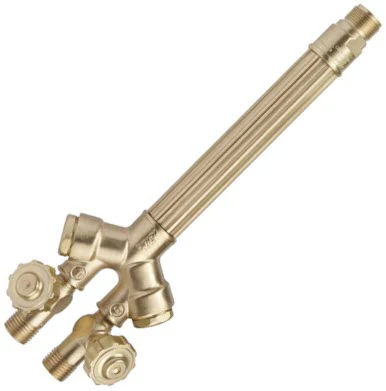
Victor Torch Handle – 100FC Vanguard Medium Duty 0382-0032
- Genuine Victor® 100FC Medium Duty Torch Handle features solid brass construction and comes complete with built-in reverse flow check valves and flashback arrestors. The 100FC accepts Victor “W-1” series welding nozzles and “MFA-1” and “MFN-1” series heating nozzles. It has a direct connection to the Victor CA-1350 cutting attachment for oxy/fuel cutting operations.
- Features
- Uses Victor® “W-1” Series welding tips and “MFA-1/MFN-1” Series heating nozzles
- Built-In Flashback Arrestors – no need for accessory flash arrestors
- Built-in Reverse Flow Check Valves
- Works with all fuel gases
- Accepts Victor® CA1350 Series cutting attachment
- Hose connection – 9/16″-18 (B)
$204.00
From Novice to Expert: Understanding the Heart of Your Welding Setup
As I stood in my workshop last weekend, torch in hand and metal scraps spread across my workbench, I realized something important. Most welders—myself included—rarely give our equipment the attention it deserves until something goes wrong. For years, I’ve relied on my trusty Victor 100FC torch for countless projects, from basic repairs to intricate metal sculptures, but I never truly understood its inner workings until I was forced to replace parts.
That’s why I’ve created this comprehensive guide. After spending hours researching, testing, and consulting with industry veterans, I want to share everything I’ve learned about the Victor 100FC torch system. Whether you’re troubleshooting an issue, seeking replacement parts, or simply wanting to understand your equipment better, this guide has you covered.
Understanding the Anatomy of Your Victor 100FC Torch
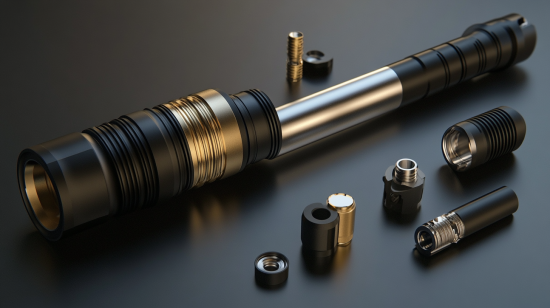
The Victor 100FC isn’t just a tool—it’s a precision instrument with multiple components working in harmony. Before diving into replacement parts, let’s break down what makes up this versatile torch.
The Core Components
The torch handle is the foundation of your entire cutting and welding system. This ergonomic component houses the oxygen and fuel gas valves, providing precise control during operation. The handle connects to the cutting attachment and various tips through a series of connectors and fittings.
The standard Victor 100FC package typically includes:
- Main torch handle with control valves
- Cutting attachment
- Multiple cutting tips (sizes vary)
- Welding tips (sizes vary)
- Mixer assembly
- Hose connections
- Regulators (sometimes sold separately)
Each component plays a crucial role in the functionality of your torch, and understanding their purpose is the first step in proper maintenance and replacement.
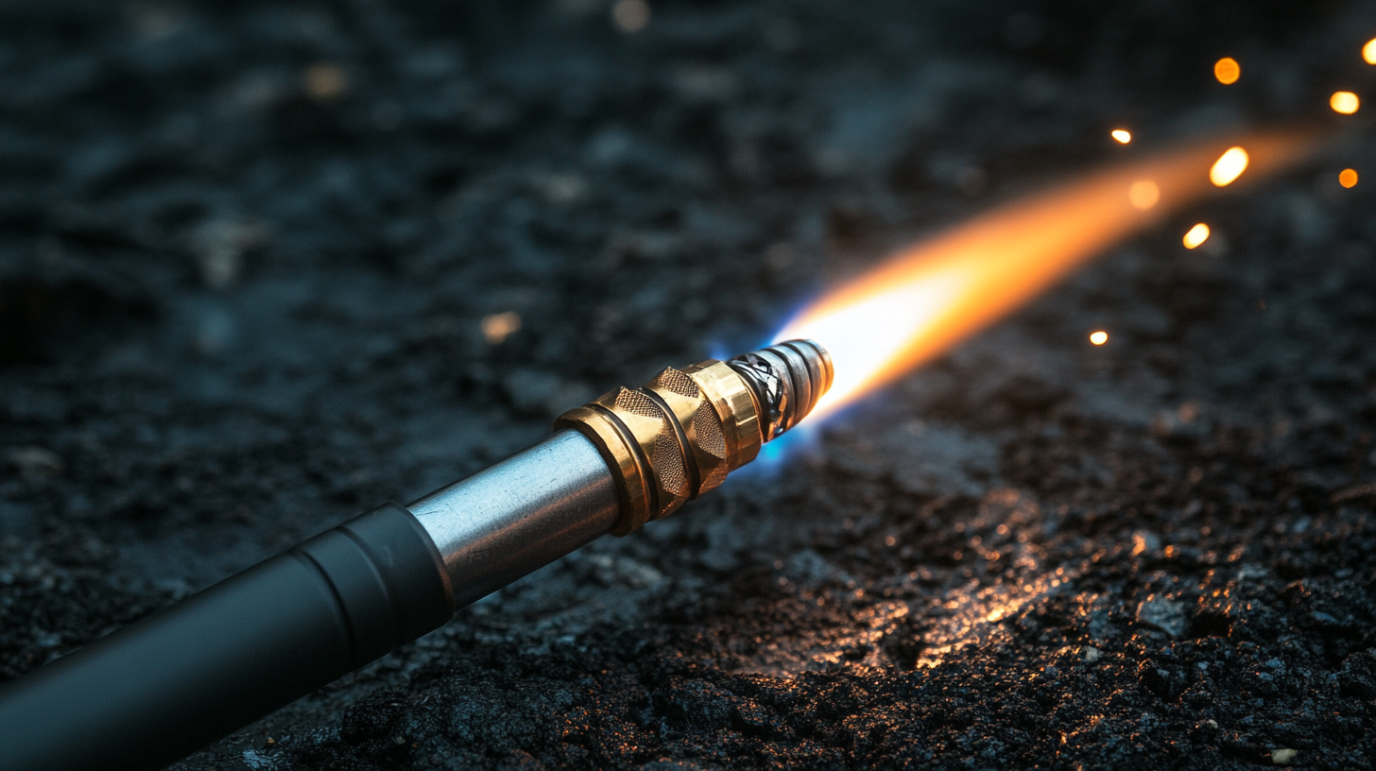
The Cutting Attachment: Your Precision Tool
The cutting attachment transforms your basic torch into a precision cutting instrument. It consists of a lever-operated oxygen valve that delivers a concentrated stream of oxygen to the cutting tip when activated. This high-pressure oxygen stream is what actually cuts through metal after it’s been preheated by the preheat flames.
What makes the Victor 100FC cutting attachment special is its balance and control. The lever placement allows for smooth, one-handed operation while maintaining stability during critical cuts. When examining replacement attachments, pay close attention to build quality and lever action—these factors directly impact cutting performance.
Identifying the Correct Parts for Your Victor 100FC
One of the most common frustrations I’ve encountered (and heard from fellow welders) is ordering the wrong replacement parts. Let’s clear up some confusion.
Model-Specific vs. Universal Parts
While some components are universal across various Victor torch models, many parts for the 100FC are model-specific. This is especially true for the cutting attachment, valve stems, and certain connection points.
To identify your exact model, check the stamping on the handle and cutting attachment. You’ll typically find “100FC” clearly marked, but you might also see additional numbers or letters that indicate variations or manufacturing dates.
When ordering replacements, always reference both the model number and the specific part number when available. Photos can help when communication with suppliers, particularly for older or worn components where markings may be less visible.
The Numbering System Decoded
Victor parts follow a specific numbering convention that can initially seem confusing. For example, cutting tips are labeled with numbers like 0, 1, 2, etc. These numbers correspond to the orifice size, with larger numbers indicating larger holes for greater gas flow and cutting thicker materials.
Similarly, welding tips are typically marked with numbers ranging from 00 to 8+, again corresponding to size and appropriate material thickness.
Here’s a quick reference guide I’ve compiled:
For cutting tips:
- Size 000: Up to 1/16″ material
- Size 00: 1/16″ to 1/8″ material
- Size 0: 1/8″ to 1/4″ material
- Size 1: 1/4″ to 1/2″ material
- Size 2: 1/2″ to 1″ material
- Size 3: 1″ to 2″ material
- Size 4: 2″ to 4″ material
- Size 5: 4″ to 8″ material
For welding tips:
- Size 000: Up to 1/32″ material
- Size 00: 1/32″ to 1/16″ material
- Size 0: 1/16″ to 3/32″ material
- Size 1: 3/32″ to 5/32″ material
- Size 2: 5/32″ to 1/4″ material
- Size 3: 1/4″ to 3/8″ material
- And so on…
Where to Source Quality Victor 100FC Replacement Parts
Finding reliable parts suppliers has been perhaps the most challenging aspect of maintaining my torch. Over the years, I’ve explored numerous options and can offer insights on the pros and cons of each approach.
Authorized Victor Distributors
For guaranteed compatibility and quality, authorized Victor distributors remain the gold standard. These suppliers carry official Thermadyne/Victor parts and can provide expert advice on compatibility. The downside? Higher prices and sometimes limited availability for older models.
My go-to authorized distributors include welding supply stores like Airgas, Praxair, and other industrial suppliers with dedicated welding departments. These establishments often employ knowledgeable staff who can help identify the exact part you need.
Independent Welding Supply Shops
Local welding supply shops often stock Victor parts and offer competitive pricing. The advantage here is personalized service and the ability to physically examine parts before purchase. I’ve found that building a relationship with a local shop can lead to better service and occasional deals on hard-to-find components.
Online Marketplaces
Amazon, eBay, and specialized welding websites offer extensive selections of both OEM and aftermarket Victor parts. While prices are often competitive, quality can vary dramatically, especially with aftermarket options. I recommend reading reviews carefully and sticking with sellers who specialize in welding equipment rather than general merchandise retailers.
Rebuilding Kits and Options
For comprehensive overhauls, rebuilding kits offer excellent value. These kits typically include O-rings, valve seats, and other common wear items for a complete restoration of your torch. Victor and third-party manufacturers offer these kits at various price points, with quality generally correlating with price.
The Cost Landscape: Budgeting for Replacement Parts
Understanding the cost structure of Victor 100FC parts helps in budgeting for maintenance and repairs. Based on my experience and current market research, here’s what you can expect to pay:
Handle Components
- Complete replacement handle: $80-150
- Valve rebuild kit: $15-40
- Individual valve stems: $10-25 each
- O-ring sets: $5-15
Cutting Attachment and Tips
- Complete cutting attachment: $60-120
- Individual cutting tips: $8-30 (price varies by size)
- Tip cleaning kits: $10-30
Welding Components
- Welding tip set: $40-100 (depending on number of tips)
- Individual welding tips: $8-25 each
- Mixer replacement: $15-40
Hose Connections and Accessories
- Hose connection fittings: $5-20 each
- Flash arrestors: $15-40 per pair
- Check valves: $10-30 per pair
These prices reflect new, OEM parts as of my last research. Aftermarket alternatives can reduce costs by 20-40%, while used parts from reputable sources might cut expenses by 50% or more.
The Art of Replacement: Step-by-Step Guides
Over the years, I’ve replaced nearly every component on my Victor 100FC. Here are the procedures I’ve refined through experience.
Replacing Cutting Tips
Cutting tips are the most frequently replaced components, as they wear down with use and can become damaged.
- Ensure the torch is completely shut off and disconnected from gas supplies
- Use the appropriate wrench (typically 3/4″) to loosen the tip
- Unscrew counterclockwise until the tip is free
- Inspect the seat for damage or debris
- Apply a small amount of copper anti-seize to the threads of the new tip (optional but recommended)
- Hand-thread the new tip to avoid cross-threading
- Tighten with wrench until snug, but avoid over-tightening
Pro tip: Keep multiple cutting tip sizes on hand to address different material thicknesses without interrupting your workflow.
Handle Valve Maintenance and Replacement
Valve issues often manifest as leaks or difficult operation. Here’s my process for rebuilding:
- Shut off and disconnect all gas supplies
- Remove the handle knobs by loosening set screws
- Use appropriate wrench to remove valve stems
- Carefully inspect O-rings and valve seats for wear
- Replace O-rings and any damaged components
- Apply a small amount of valve lubricant to O-rings
- Reassemble in reverse order
- Test for leaks using soapy water solution before pressurizing fully
Cutting Attachment Overhaul
For a complete cutting attachment restoration:
- Disconnect the attachment from the handle
- Disassemble the lever mechanism carefully, noting component positioning
- Clean all parts thoroughly with appropriate solvents
- Replace O-rings and seats
- Check spring tension and replace if necessary
- Lubricate moving parts sparingly with high-temperature lubricant
- Reassemble carefully, ensuring proper alignment
- Test functionality before reconnecting to gas supply
Maintenance Practices That Extend Part Life
Through trial and error (and some costly replacements), I’ve developed these maintenance practices that significantly extend the lifespan of Victor 100FC components.
Daily Maintenance
After each use, I follow these simple steps:
- Clean tip orifices with appropriate size tip cleaners (never use metal wire or drill bits that could enlarge the orifice)
- Wipe down external surfaces with a clean cloth
- Store in a dry, clean location
- Keep valve knobs slightly open when not in use to prevent seizing
Weekly Maintenance
Once a week, or after approximately 8-10 hours of use:
- Check all connections for tightness
- Inspect O-rings for wear or damage
- Clean valve stems with a soft cloth
- Test for leaks using soapy water solution
- Lubricate threads lightly if necessary
Monthly Maintenance
Every 4-6 weeks, perform these more detailed procedures:
- Disassemble cutting attachment and clean thoroughly
- Inspect valve seats and replace if worn
- Clean mixer assembly to remove any carbon buildup
- Check hose connections for cracks or damage
- Verify regulator function and accuracy
Yearly Overhaul
Once a year, I perform a complete system refresh:
- Replace all O-rings regardless of apparent condition
- Clean all components with appropriate solvents
- Replace any worn valve components
- Test the entire system methodically
- Update my parts inventory
Troubleshooting Common Victor 100FC Issues
Even with proper maintenance, issues can arise. Here are the most common problems I’ve encountered and their solutions.
Leaking Valves
Symptom: Gas continues to flow when valve is closed, or you hear a hissing sound.
Cause: Typically worn O-rings or damaged valve seats.
Solution: Rebuild or replace valve assembly. In emergencies, sometimes slightly tightening the packing nut can temporarily resolve the issue.
Poor Flame Quality
Symptom: Unstable, fluctuating, or discolored flame.
Cause: Often results from dirty tip orifices, incorrect gas pressures, or mixer issues.
Solution: Clean tips thoroughly, verify correct gas pressures according to tip charts, and inspect mixer for obstructions.
Difficult Cutting
Symptom: Cuts are rough, incomplete, or require excessive pressure.
Cause: Usually worn cutting tips, incorrect gas mixture, or improper technique.
Solution: Replace cutting tip, verify gas pressures, and review cutting technique (preheat adequately before engaging cutting oxygen).
Sticky Valves
Symptom: Valves are difficult to turn or seem to catch.
Cause: Typically internal corrosion or dried lubricant.
Solution: Disassemble valve, clean thoroughly, and apply fresh valve lubricant.
Aftermarket vs. OEM: Making the Right Choice
The debate between original equipment manufacturer (OEM) parts and aftermarket alternatives is ongoing in the welding community. Here’s my perspective after trying both options extensively.
When OEM Makes Sense
I prefer OEM parts for these critical components:
- Valve assemblies – The precision engineering affects safety and performance
- Cutting attachments – The balanced design and durability justify the cost
- Regulators – These directly impact gas flow and pressure accuracy
When Aftermarket Is Acceptable
I’ve had good experiences with aftermarket versions of:
- Cutting tips – Many are manufactured to identical specifications
- Basic O-rings – Standard sizes work well if material quality is good
- Hose connections – Simple components with standardized threading
Evaluating Aftermarket Quality
Not all aftermarket parts are created equal. I look for these indicators of quality:
- Material specifications – Brass composition should match OEM standards
- Manufacturing location – Parts from established industrial centers often maintain better quality control
- Return policy – Reputable sellers stand behind their products
- User reviews – Experienced welders can spot quality issues quickly
The Warranty Landscape
Understanding warranty coverage can save significant money over time. Here’s what I’ve learned about Victor’s warranty policies and how to navigate them.
Standard Victor Warranty Terms
Most new Victor 100FC torches and components carry a 1-year warranty against manufacturing defects. This typically covers:
- Material defects
- Assembly issues
- Premature failure under normal use
The warranty generally excludes:
- Normal wear and tear
- Damage from improper use
- Modifications or repairs using non-approved methods
- Damage from improper storage or maintenance
Maximizing Warranty Benefits
To get the most from warranty coverage:
- Register your purchase immediately with Victor/Thermadyne
- Keep all receipts and documentation
- Document any issues with photographs
- Work with authorized dealers for warranty claims
- Be prepared to ship defective parts for inspection
Extended Protection Options
Some distributors offer extended warranty programs or service plans. These can be worthwhile for professional users who depend on their equipment daily. Typical costs range from 10-20% of the purchase price for an additional year of coverage.
When to Rebuild vs. Replace
One of the most common questions I receive from fellow welders is whether they should rebuild their existing components or simply replace them entirely. Here’s my decision framework:
Factors Favoring Rebuild
- The basic structure is sound with no cracks or significant damage
- Replacement parts are expensive or difficult to source
- You have experience with rebuilding similar components
- The issue is clearly related to O-rings or other serviceable parts
- You value the “broken-in” feel of your existing equipment
Factors Favoring Replacement
- Multiple components are worn or damaged
- The cost of rebuild parts approaches 70%+ of new component cost
- The component has been rebuilt multiple times already
- You notice structural issues like cracks or excessive wear
- Safety components are involved (regulators, flash arrestors, etc.)
The Economics of Rebuilding
As a general rule, I consider full replacement when rebuild parts exceed 70% of new component cost. However, this calculation shifts if:
- The equipment has sentimental value
- You enjoy the rebuilding process as a learning experience
- The component is no longer manufactured or hard to find
- You’re in a time crunch and rebuilding is faster than sourcing replacements
The Lifespan of Victor 100FC Components
Understanding the typical lifespan of various components helps in planning maintenance and replacement schedules. Based on my experience and conversations with professional welders, here are the average lifespans under regular use:
Handle Assembly
With proper maintenance, the main handle can last 10-20+ years. The limiting factors are usually the valve stems and seats, which may require replacement every 3-5 years depending on use.
Cutting Tips
Cutting tips typically last 6-12 months under regular use before performance begins to degrade. With meticulous cleaning and careful use, this can be extended significantly.
Cutting Attachment
A well-maintained cutting attachment should last 5-10 years. The oxygen lever mechanism is usually the first to show wear, particularly the spring tension and O-rings.
Valve Components
Valve stems and seats typically require attention every 3-5 years. O-rings may need replacement more frequently, especially in demanding environments or with irregular use.
Hoses and Connections
Quality hoses can last 5-8 years before developing cracks or losing flexibility. Connections and fittings often exceed this lifespan unless damaged during use.
Creating Your Victor 100FC Parts Inventory
One practice that has saved me countless hours of downtime is maintaining a strategic inventory of replacement parts. Here’s my recommendation for a basic spare parts kit:
Essential Spares
- Complete set of cutting tips in your most-used sizes
- O-ring kit for handle and cutting attachment
- Valve rebuild kit
- Spare mixer
- Tip cleaning tools
Nice-to-Have Extras
- Backup cutting attachment
- Extra hose connections and check valves
- Specialized tips for less frequent applications
- Complete handle (if budget allows)
Storage Considerations
I store my spare parts in a dedicated container with individual compartments, clearly labeled. Each component is lightly oiled if appropriate and sealed in plastic bags to prevent corrosion. I also keep a log of part numbers, purchase dates, and suppliers for easy reordering.
The Technical Manual Approach
While Victor provides basic documentation, I’ve found that creating my own technical reference dramatically improves maintenance efficiency. My personal Victor 100FC manual includes:
- Exploded diagrams of each component (photocopied from original documentation and enhanced with my notes)
- Part numbers for all components
- Torque specifications for threaded connections
- Pressure settings for different tip sizes
- Maintenance schedule with checkboxes
- Troubleshooting flowcharts based on symptoms
This custom manual lives in my workshop and has saved me countless hours of research and trial-and-error.
Recognizing When Parts Need Replacement
Prevention is always better than cure. Here are the warning signs I’ve learned to watch for that indicate imminent component failure:
Visual Indicators
- Discoloration around threaded connections (indicates leakage)
- Scoring or excessive wear marks on valve stems
- Deformation of tip orifices
- Cracking or crazing on brass components
- Corrosion or mineral deposits
Functional Indicators
- Inconsistent flame characteristics
- Difficulty adjusting gas flow
- Changes in normal operating sounds
- Reduced cutting efficiency
- Valve knobs that feel loose or imprecise
- Leaks that develop after temperature changes
Safety Indicators
- Any hissing sound when the system is pressurized
- Fluctuating regulator readings
- Flashback occurrences
- Excessively hot handle during operation
- Difficulty shutting off gas completely
When any safety indicator appears, immediately discontinue use until the issue is resolved.
Conclusion: The Value of Understanding Your Tools
As I’ve journeyed from novice to experienced welder, I’ve discovered that truly understanding my tools—particularly my Victor 100FC torch—has been transformative. Not only has it saved me money through timely maintenance and smart parts purchasing, but it’s also improved the quality of my work and my enjoyment of the craft.
The torch isn’t just a tool; it’s an extension of the craftsman’s hand and vision. By mastering its components, maintenance, and optimization, you elevate your entire practice.
I hope this guide serves as a valuable resource on your own journey with the Victor 100FC torch. Remember that every repair, replacement, or adjustment is an opportunity to deepen your understanding and improve your skills. Happy welding!